


The Buzz About Blank Street Cafe
And Midsummer Berry Fool

I've been reminiscing a lot lately about simplicity in cooking, and how sometimes the most impressive dishes are those that let the ingredients shine. You know, without too much fuss or too many complicated steps. And honestly, for Midsummer, when you want to be outside, enjoying the long evenings, you don't want to be slaving away in a hot kitchen, do you?
So, this week, I've got a recipe for you that hits all those notes: it's effortlessly elegant, packed with summer flavour, and surprisingly easy to pull together. It's my take on a Midsummer Berry & Elderflower Fool with Toasted Almonds.
Now, a "fool" might sound a bit silly, but it's a classic British dessert, traditionally made by folding stewed fruit into custard or, more commonly now, whipped cream. It's light, airy, and utterly delightful. And by adding elderflower – that quintessential taste of British summer hedgerows – we really capture that Midsummer magic. Plus, the toasted almonds add a lovely little crunch and a subtle nuttiness that just elevates the whole thing.
I chose this because it’s no-bake, which is a huge plus when it’s warm out. And it showcases those beautiful summer berries without needing to be a full-on cake or tart, which can sometimes feel a bit heavy. This is just pure, unadulterated summer joy in a glass.
I often find myself gravitating towards recipes that bring back a feeling, a memory. And this one reminds me of those long, golden evenings, where the air is still warm and the scent of honeysuckle drifts in. It’s perfect for a BBQ dessert, a garden party, or even just a quiet moment on the patio, savouring the season. You can easily scale it up for a crowd or make individual portions for a pretty presentation.
Let's get to it, then.
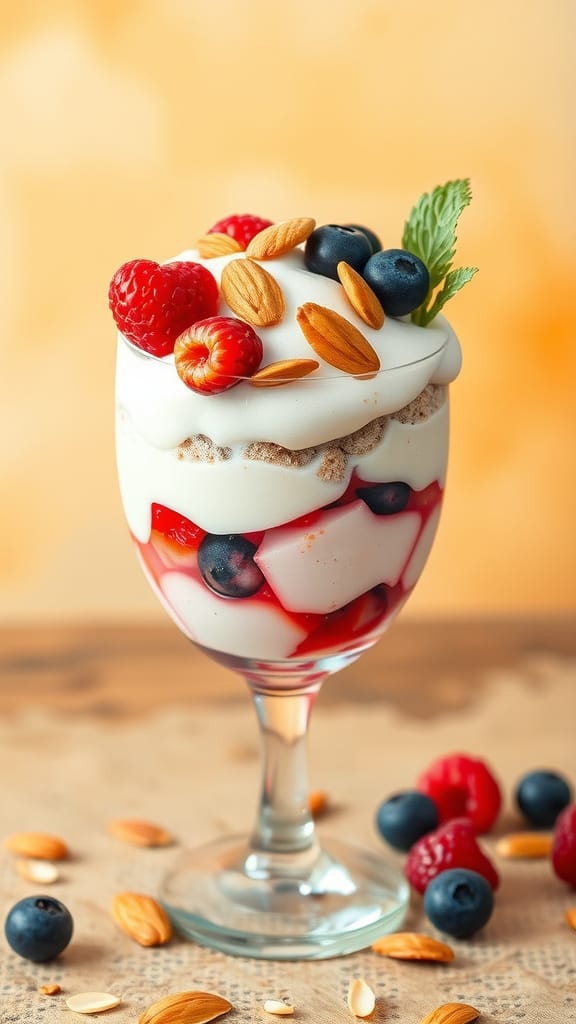
Recipe of the Week: Midsummer Berry & Elderflower Fool with Toasted Almonds
This dessert is a celebration of peak summer berries and the delicate floral notes of elderflower. It’s light, refreshing, and incredibly easy to make, perfect for those long Midsummer evenings when you want something sweet without too much fuss.
Yields: 4-6 servings Prep time: 20 minutes (plus chilling time)
Ingredients:
For the Berry Puree:
300g mixed summer berries (strawberries, raspberries, blueberries, redcurrants – fresh is best, but good quality frozen will work too)
2-3 tablespoons caster sugar (adjust to taste, depending on the sweetness of your berries)
1 tablespoon fresh lemon juice
For the Elderflower Cream:
400ml double cream (or whipping cream)
2-3 tablespoons elderflower cordial (or to taste – start with less and add more if you like a stronger flavour)
1 teaspoon vanilla extract
1-2 tablespoons icing sugar (optional, for extra sweetness if desired)
For the Toasted Almonds:
50g flaked almonds
For Garnish (Optional):
Fresh mint sprigs
A few extra whole berries or redcurrant sprigs
Equipment:
Small saucepan
Potato masher or fork
Large mixing bowl
Electric whisk (or a good old balloon whisk and strong arm!)
Serving glasses or a large serving bowl
Method:
Prepare the Berry Puree:
Pop your mixed berries into a small saucepan. Add the caster sugar and lemon juice.
Place the saucepan over a medium-low heat. Let the berries gently warm through, stirring occasionally, until they start to release their juices and soften, about 5-7 minutes. You don't want them mushy, just soft enough to mash easily.
Remove from the heat. Using a potato masher or a fork, gently mash the berries until you have a coarse puree. I like to leave some small chunks of fruit for texture, but if you prefer it completely smooth, you can press it through a sieve or blitz it quickly in a food processor (though I think the rustic texture is part of the charm!).
Taste the puree and add more sugar if needed. Remember, the cream won't be overly sweet, so this is where you can balance the tartness.
Set aside to cool completely. This is important – you don't want warm berries melting your lovely whipped cream! You can even pop it in the fridge for a faster cool down.
Toast the Almonds:
While the berry puree is cooling, preheat a dry frying pan or skillet over medium heat.
Add the flaked almonds to the pan in a single layer.
Toast them gently, stirring frequently, for about 3-5 minutes until they turn a beautiful golden brown and smell fragrant. Keep a close eye on them – they can go from toasted to burnt in seconds!
Tip the toasted almonds onto a plate to cool completely. This keeps them crisp.
Make the Elderflower Cream:
In your large mixing bowl, pour in the double cream.
Add the elderflower cordial and vanilla extract.
Using an electric whisk (or your balloon whisk and some elbow grease!), whip the cream until it forms soft peaks. You want it light and airy, but still holding its shape. Be careful not to over-whisk, or it will become grainy.
Taste the cream. If you prefer it sweeter, add a tablespoon or two of icing sugar and whisk briefly to combine. I find the elderflower cordial adds enough sweetness for me, but it's totally up to your preference!
Assemble the Fool:
Once the berry puree is completely cold, gently fold it into the elderflower cream. Don't overmix! You want to create lovely swirls and streaks of pink and white, not a uniform colour. This gives it that beautiful, informal "fool" look. A few gentle folds are all it takes.
Chill and Serve:
Spoon the Midsummer Berry & Elderflower Fool into individual serving glasses, or transfer it to a large, pretty serving bowl.
Cover and refrigerate for at least 1-2 hours. This allows the flavours to meld and the fool to firm up slightly. It’s also lovely if you can make it a few hours ahead, or even the night before, as the flavours deepen beautifully.
Just before serving, sprinkle generously with the cooled toasted flaked almonds.
Garnish with fresh mint sprigs and a few extra berries or a delicate redcurrant sprig for that final flourish.
My Little Tips & Thoughts:
Berry Choices: While mixed berries are lovely, this fool is also divine with just strawberries or just raspberries. Go with what looks best at your local market! If using frozen berries for the puree, they'll release more liquid, which is fine, but make sure to cook them down a little more if it seems too watery.
Elderflower Intensity: Elderflower cordial varies in strength. Start with 2 tablespoons and add more if you really want that floral punch. You can also get elderflower liqueur (like St-Germain) for a more grown-up version, using a bit less as it's stronger.
Presentation: Layering the berry puree and cream in the glasses can create a stunning visual. Just alternate spoonfuls of each and then give a very light swirl with a knife.
Make Ahead: This is a fantastic make-ahead dessert. The flavours improve with a bit of chilling time. Just add the toasted almonds right before serving to keep them crunchy.
There you have it. A dish that embodies the lightness and joy of Midsummer. Enjoy those long, beautiful days, and let this sweet treat be a part of your celebrations. Happy cooking, my fellow foodies!
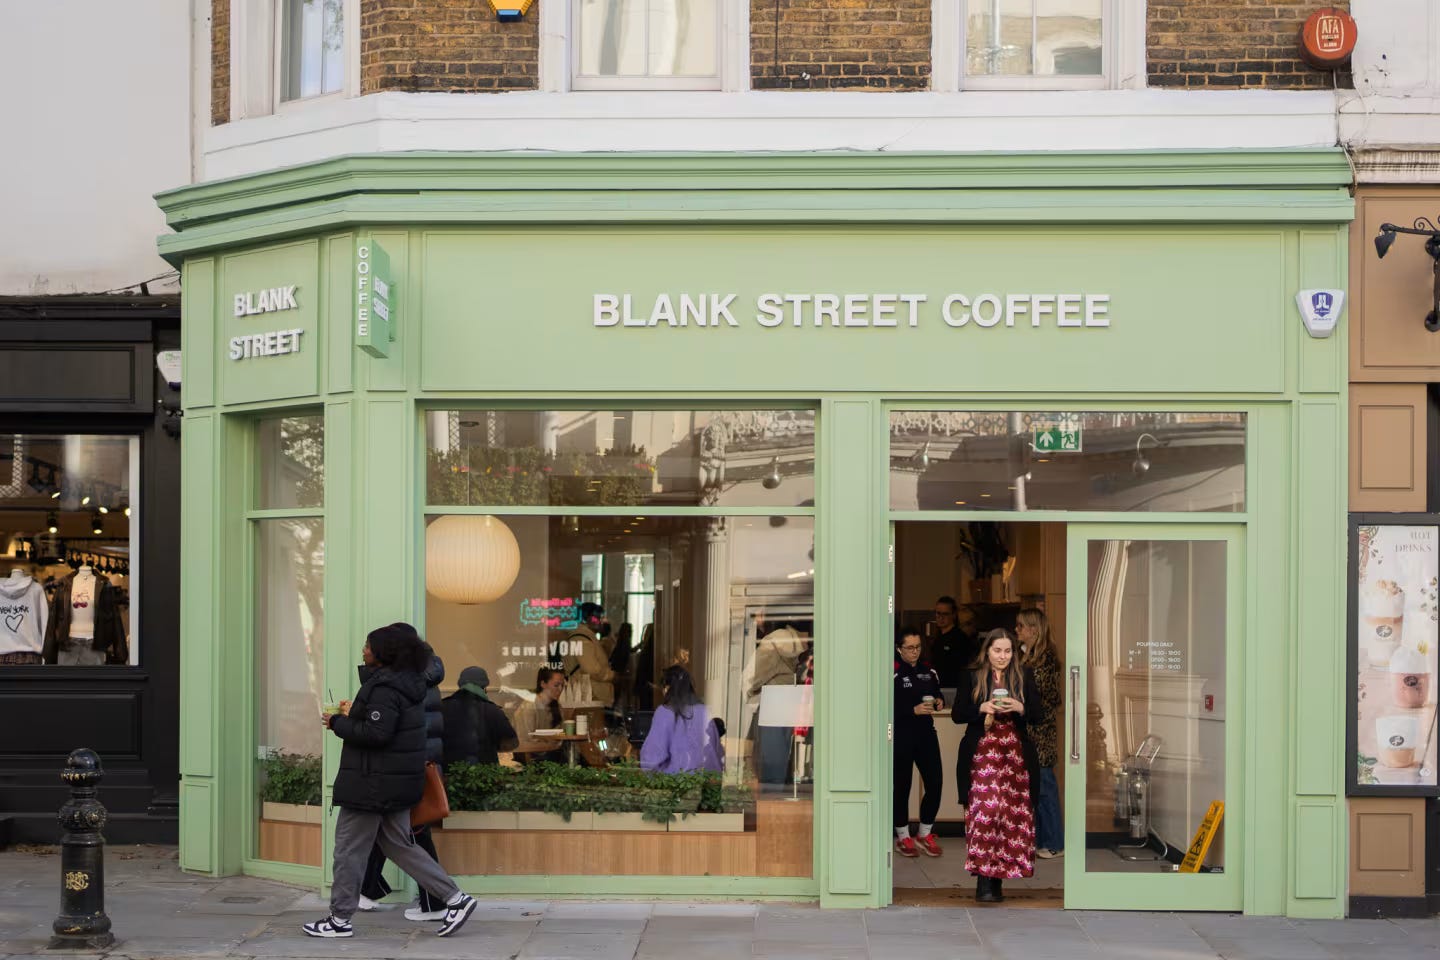
Dining Spotlight of the Week: Blank Street Cafe
You know, sometimes you stumble upon something, and it just clicks. Like that perfect little cafe you’ve always dreamed of finding, the one that just gets it right. For me, recently, that feeling has been all about Blank Street Cafe. And let me tell you, it's not just another coffee shop; it's a whole vibe, a clever concept that's really shaking things up in the coffee world. I wanted to share a bit about them, because honestly, I’m a bit smitten.
I remember the first time I heard about Blank Street. It was probably on some design blog or a trendy Instagram account, showing off their minimalist, mint-green aesthetic. At first, I thought, "Oh, another pretty coffee shop." But then I started digging a bit deeper, and what I found was actually pretty fascinating. These guys, Vinay Menda and Issam Freiha, two mates who met while studying in New York, started this whole thing in 2020. Can you believe it? Right in the middle of all that chaos, they launched a coffee venture. Talk about guts!
Their initial idea was so simple, yet so brilliant. They started with this tiny, battery-powered mobile coffee cart in a parking lot in Williamsburg, Brooklyn. A coffee cart! It’s such a humble beginning, isn’t it? But they saw a gap in the market. They were thinking, "Why does good quality coffee have to be so expensive, and why do coffee shops have to be these huge, sprawling places?" They were inspired by those high-growth, small-format, and mobile-first food businesses they'd seen in Asia, and they thought, "We can do that here." And they did. Oh, how they did.
What really resonated with me about their story is this idea of making quality coffee accessible. I mean, who hasn't felt that sting of paying an arm and a leg for a decent flat white? It gets a bit much, especially when you're trying to make it a daily ritual, something enjoyable rather than a luxury. Menda and Freiha really believed that coffee has this power – to bring people together, to spark creativity, or just to offer a quiet moment in a ridiculously busy day. And they wanted to create spaces that reflected that, without all the pomp and circumstance.
They focus on quality, sustainability, and community, and you can really feel that when you step into one of their spots. They're big on sourcing good beans, working directly with farmers to ensure fair prices and sustainable practices. That’s something that truly matters to me. It's not just about the taste; it's about the ethics behind it. And honestly, their coffee? It's consistently good. Like, really good.
What I love most is their approach to the physical spaces themselves. You see, they didn’t go for massive, sprawling cafes. Quite the opposite. They started with those carts, and then moved into smaller, more efficient brick-and-mortar spots. They call it taking advantage of "blank spaces" in streets and neighbourhoods. It makes so much sense, doesn't it? Instead of needing a huge footprint, they fit into these neat, compact units, often in high-traffic areas, making it super convenient. They've also invested in tech, like automated espresso machines, which I found a bit surprising at first. But the idea behind it is genius: it frees up their baristas to actually connect with customers, to provide that friendly, welcoming service, rather than being bogged down with endless grinding and pulling. Plus, it means a consistent cup every single time. And their app? So handy for pre-ordering. It just streamlines the whole experience, and let’s be honest, in this fast-paced world, convenience is king.
They also make a point of partnering with local businesses for their pastries and other grab-and-go items. It adds to that community feel, supporting local bakers and producers, which is something I always champion in my newsletter. It's not just about their coffee; it's about building a little ecosystem around their cafes, making them a true part of the neighbourhood. They even had a "regulars program" for a while, offering daily free drinks for a monthly fee. That’s a genius move for building loyalty, isn't it? It makes you feel like you're part of something.
Now, about where you can find these mint-green havens. They’ve been growing pretty fast, which, frankly, is a testament to how well their model works. They really took off in New York first, starting in Brooklyn and Manhattan. You can pretty much trip over a Blank Street now if you're wandering around those areas. They've got dozens of locations all over. Places like 3rd & E 83rd St, MetroTech Centre, Broadway & E 4th St, Flatbush & Park Pl... the list goes on and on. It’s wild how quickly they popped up.
Then, they started expanding further afield in the US. Boston was one of the first cities outside of New York to welcome them. They opened their first Boston location in Beacon Hill in 2022, and since then, they've been spreading. I heard they even opened their largest Boston location yet in Brookline recently, which is pretty exciting for those in the area. Washington D.C. also got a taste of Blank Street in 2022, with a debut in Dupont Circle. It's clear they're not just a New York phenomenon anymore; they're becoming a significant player across the East Coast of the US.
But it’s not just the States where Blank Street has made its mark. And this is where it gets particularly interesting for us across the pond. They hopped over to the UK in 2022, and honestly, the expansion there has been phenomenal. I remember hearing about their first London spot in Fitzrovia and thinking, "Finally, something new and exciting in the coffee scene!" Since then, they’ve just been popping up everywhere in London. Finsbury Square, Queensway, Camden Market, Norton Folgate, Clapham Junction, Canary Wharf, Redchurch Street, Liverpool Street, King's Road, Gloucester Road Station, South Kensington, Notting Hill Gate, Westfield London, Ealing, Charing Cross Road, Paddington, St Pauls, Angel, King's Cross, Regent Street, Charlotte Street, and even Battersea Power Station. It’s like they’ve blanketed the city!
And it's not just London either. They’ve started expanding into other major UK cities, which is fantastic. Manchester has a few now, including one at the iconic Trafford Centre, which I'm told is a busy spot. Birmingham also has locations. It’s clear the UK is a big focus for them right now, and frankly, I think it’s a brilliant move. The UK coffee market is ripe for this fresh, quality-focused, and convenient approach. There's so much appreciation for good coffee here, but also a demand for speed and ease.
Now, I know what some of you might be thinking. "Another chain?" And yes, they are a chain, but they really do try to maintain that local, neighbourhood feel. The small footprints, the focus on community, the collaborations with local brands – it all helps. And while they’ve received significant investment, which no doubt fuels their rapid growth, they seem to be using it to deliver on their promise of quality and accessibility.
I’m always fascinated by how these concepts start and grow. Blank Street began with this simple idea of making good coffee less of a hassle and less of a hit to your wallet. And they've done it. They've proved that you don't need a sprawling, overly-designed space to offer a great coffee experience. Sometimes, all you need is a welcoming smile, a consistent, delicious brew, and a moment of calm.
So, if you find yourself near a mint-green storefront with "Blank Street" written on it, I highly recommend popping in. Grab a coffee, maybe a pastry from one of their local partners. Take a moment. See if you feel that same sense of ease and quality that I do. It’s definitely earned its place in my "Foodie Scribbles" Dining Spotlight, and I think it’s a concept that’s only going to continue to grow and evolve. It’s exciting to watch, isn’t it? To see how something so simple can become such a significant part of people’s daily routines. It's definitely changed mine, even if just by adding another reliable spot to get my much-needed caffeine fix. And sometimes, that's all you need.
Foodie Tip of the Week: Blanching and Shocking
Okay, for the "Foodie Tip of the Week," I want to share something that's been a game-changer for me, especially now that we're heading deeper into summer. You know how it is – the sun's out, everyone's a bit more relaxed, and the thought of spending hours over a hot stove… well, it’s not exactly appealing, is it? We want fresh, quick, and vibrant.
I've found myself leaning heavily into one particular technique that not only saves time but also elevates so many simple dishes. It's about getting the most out of your fresh produce, especially those beautiful, ripe vegetables and herbs that are so abundant right now.
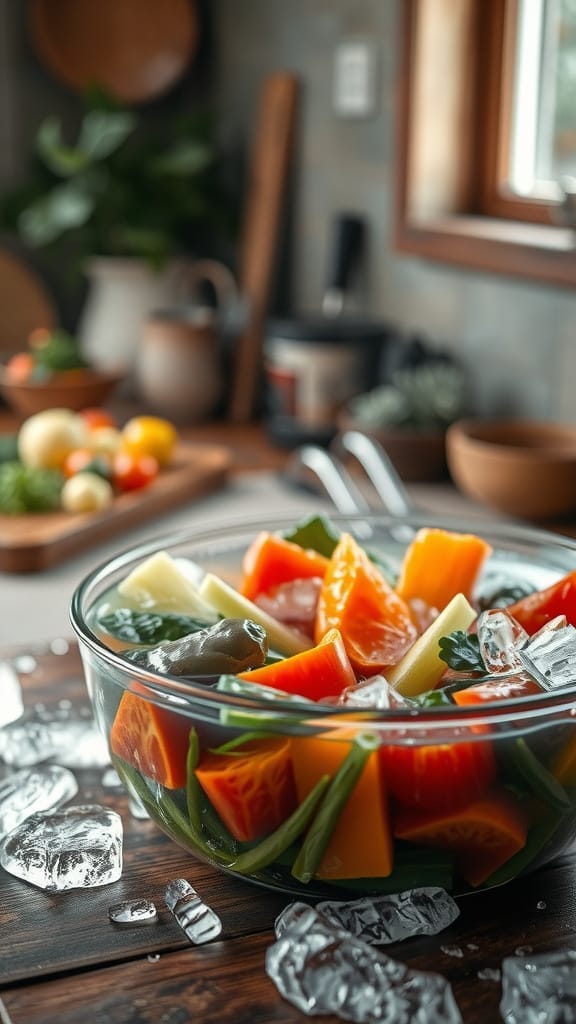
My tip this week is all about Blanching and Shocking Your Greens and Summer Vegetables.
Now, I know "blanching and shocking" might sound a bit like a fancy chef term, but trust me, it's incredibly simple, and once you master it, it opens up a whole new world of quick, vibrant, and delicious food. It’s perfect for everything from green beans and asparagus to broccoli, spinach, and even tender young peas.
So, what is it, exactly?
Blanching is simply plunging your vegetables into boiling, salted water for a very short period, usually just 30 seconds to a couple of minutes, depending on the vegetable and its size.
Shocking (or "refreshing," as some call it) is immediately transferring those blanched vegetables into a bowl of ice-cold water (with plenty of ice!).
Why is this my go-to tip for summer?
Vibrant Colour: This is probably the most visually striking benefit. Blanching and shocking locks in that beautiful, bright green colour of vegetables. Think of those dull, olive-green steamed beans versus brilliantly emerald ones – it’s a huge difference! It makes your salads, sides, and stir-fries look incredibly appealing.
Perfect Texture: It cooks the vegetables just enough so they lose their raw harshness but retain a wonderful crisp-tender bite. No more mushy greens! This is especially good for things like broccoli florets or asparagus spears that you want to be tender but still have some crunch.
Nutrient Retention: Because the cooking time is so brief, more of the heat-sensitive vitamins and nutrients in your vegetables are preserved compared to longer cooking methods.
Flavour Enhancement: The brief dip in salted water and the rapid cooling really bring out the natural sweetness and flavour of the vegetables. They taste fresher, brighter, and more "themselves."
Preparation Power-Up (My Favourite Bit!): This is where it becomes a true time-saver. You can blanch and shock a big batch of vegetables at the beginning of the week. Once they're completely chilled and drained, pat them really dry and store them in an airtight container in the fridge for 3-4 days. Then, when you’re ready to eat, they’re practically pre-cooked!
Quick Salads: Toss them cold into a vibrant summer salad with a simple vinaigrette.
Speedy Stir-Fries: Add them in the last minute of a stir-fry to just warm them through.
Instant Sides: A quick sauté with a knob of butter and some garlic, or a drizzle of olive oil and lemon, and you have a perfect side dish in minutes.
Pasta Dishes: Throw them into warm pasta with pesto or a light sauce.
Elevated Appetisers: Think blanched asparagus wrapped in prosciutto, or quickly seared green beans with toasted sesame seeds.
How to do it (The Nitty-Gritty):
Get Your Ice Bath Ready: Before you even put water on to boil, fill a large bowl with plenty of cold water and a generous amount of ice. You want this water to be really cold, ready for action.
Boil and Salt: Bring a large pot of water to a rolling boil. Add a good pinch of salt – don't be shy! This helps season the vegetables and keeps their colour vibrant.
Blanch: Carefully add your prepared vegetables to the boiling water. Don't overcrowd the pot; do it in batches if necessary. Set a timer.
Leafy Greens (Spinach, Swiss Chard): 30 seconds to 1 minute, just until wilted and bright.
Green Beans, Asparagus, Snap Peas: 1-2 minutes, until tender-crisp.
Broccoli Florets, Carrots (sliced thin): 2-3 minutes, depending on size.
Shock! As soon as the timer goes off, use a slotted spoon or a small spider strainer to scoop the vegetables directly out of the boiling water and plunge them immediately into the ice bath. Stir them around a bit to ensure even cooling. This stops the cooking process instantly and locks in that colour and crisp texture.
Drain and Dry: Once the vegetables are completely chilled (it usually takes about as long as the blanching time), drain them thoroughly. This is crucial if you’re storing them. Lay them out on a clean kitchen towel or paper towels and gently pat them as dry as possible. Any excess water can make them soggy or cause them to spoil faster.
My Personal Experience:
I used to dread cooking green beans because they'd always end up a bit sad and grey. But ever since I started blanching and shocking them, they're a revelation! They come out perfectly bright green and with that satisfying snap. Now, I make a huge batch on a Sunday, chill them, and then I have ready-to-go green beans for quick additions to salads throughout the week, or a super-fast side dish if I'm grilling chicken or fish. It feels like such a little thing, but it saves so much time and makes every meal feel a bit more special and vibrant.
So, this week, give it a try. Grab some fresh summer greens, set up your boiling pot and your ice bath, and watch the magic happen. You'll be amazed at how this simple technique transforms your cooking and makes healthy, delicious meals even easier to enjoy during these beautiful, long days. Happy cooking!
Reader Recipe Corner: Share Your Culinary Creations! 🍽️
We want to hear from you! Do you have a cherished recipe that brings your family together? Maybe a secret dish that never fails to impress? Share your culinary creations with us! Please submit your favourite recipe, along with a photo, and get a chance to be featured in our next newsletter. Let's celebrate the joy of cooking together—your delicious ideas could inspire fellow food lovers!
Click the button below to send us your recipes! We can't wait to see what you've been cooking up! 🥘❤️
Fun Food Fact: Chocolate Chip Cookies
Alright, for this week's "Little-Known Food Fact," I wanted to pick something that feels universally loved, something comforting and familiar, but also something that has a bit of a hidden history or an unexpected twist. And considering we're in Spain, and I'm always thinking about simple pleasures, I landed on… Chocolate Chip Cookies.
Yes, those delightful, chewy, sometimes crispy, always satisfying discs of deliciousness. You've probably baked them, bought them, or devoured them straight from the oven more times than you can count. They seem so utterly American, don't they? The quintessential comfort food from across the pond. But the little-known fact about them is not about their origin per se, but rather the incredible, almost accidental, genius of their creation and the surprising way they became a worldwide phenomenon.
Here it is: The chocolate chip cookie was invented by accident, by a woman who traded the recipe for a lifetime supply of chocolate.
Let me elaborate a bit because it's such a lovely story, full of that serendipitous charm that often surrounds great food inventions.
The year was 1938. The place was the Toll House Inn in Whitman, Massachusetts, a popular restaurant and inn run by a remarkable woman named Ruth Graves Wakefield. Ruth was not just a restaurateur; she was a trained dietitian, a lecturer, and a genuinely innovative cook. She was known for her excellent home-cooked meals and desserts.
One day, Ruth was baking her famous butter drop do cookies, which were a colonial-era recipe that often included nuts. The story goes that she was planning to melt down some baker's chocolate (Nestlé semi-sweet chocolate, to be precise) and mix it into the dough, creating a chocolate cookie. However, she either ran out of her usual baker's chocolate, or perhaps she was short on time and didn't want to wait for it to melt and cool.
Instead, she decided to chop up a Nestlé semi-sweet chocolate bar into small pieces and stir them directly into the cookie dough, assuming that the chocolate pieces would melt and disperse evenly throughout the cookies as they baked, creating a fully chocolate-flavoured cookie.
But they didn't.
When the cookies came out of the oven, much to her surprise, the chocolate pieces had softened but largely held their shape, remaining as distinct, delightful chunks of chocolate embedded in the golden cookie. It wasn't the uniform chocolate cookie she intended, but what she pulled out of the oven was something entirely new and utterly delicious: the very first chocolate chip cookie.
Her guests at the Toll House Inn absolutely loved them. The cookies were an instant hit. The demand for them grew so rapidly that word eventually reached Nestlé. Seeing the immense popularity of Ruth's creation, Nestlé made a brilliant move. They struck a deal with Ruth Wakefield: in exchange for the right to print her recipe on the back of their semi-sweet chocolate bars, Ruth would receive a lifetime supply of Nestlé chocolate.
Think about that for a moment! A lifetime supply of chocolate! What a fantastic deal, especially considering the enormous success of her invention. Nestlé even started scoring their chocolate bars and included a special chopper with them, specifically designed for making Ruth's "Toll House Crunch Cookies," as they were originally called. They later even developed the chocolate "morsels" or "chips" specifically for the recipe, making it even easier for home bakers.
So, this seemingly simple cookie, which is now a global phenomenon, wasn't the result of meticulous planning or a deliberate invention process. It was a beautiful, happy accident, born from a clever cook's improvisation and a chocolate company's smart business sense. Every time you bite into a warm, gooey chocolate chip cookie, you're not just tasting chocolate and cookie dough; you're tasting a piece of culinary history, a testament to spontaneous creativity, and a reminder that sometimes, the best discoveries happen when things don't quite go to plan.
It's one of my favourite food stories because it feels so relatable. How many times have we tried to fix something in the kitchen, and it turns into something even better? It’s a wonderful example of how innovation can emerge from everyday moments. And it certainly makes me appreciate that lovely little cookie even more.

Closing Thoughts: Until Next Week! 🌟
As we wrap up this week’s edition of Foodie Scribbles, we hope you’re feeling inspired to get into the kitchen and whip up some delightful dishes! Don’t hesitate to experiment with the recipes, indulge in the flavours of our featured restaurant, and explore seasonal ingredients that are just waiting for your culinary touch.
We’d love to hear from you! Share your cooking adventures, dining experiences, or your own tips and tricks. Your insights are what make our foodie community flourish!
And don’t miss our next issue, where we’ll dive into more delicious recipes and explore even more unique dining spots to fuel your culinary wanderlust! Until next time, keep cooking, keep tasting, and keep sharing the joy of food! 🍽️❤️✨
Here are some more of my FREE Newsletters: